How to Build a Skateboard: Step by Step Assembly Guide
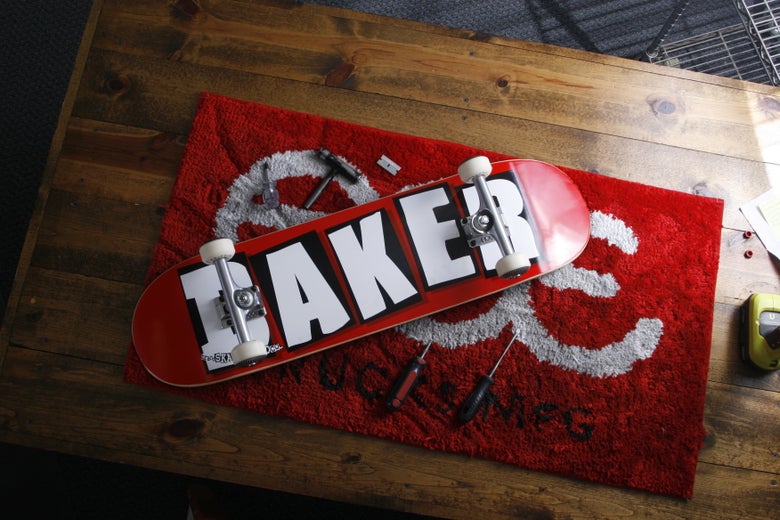
Whether you're a beginner or a seasoned skater, one essential skill every skateboarder should have is building and assembling their skateboard. Building your skateboard not only ensures that it's customized to your preferences but also provides valuable insight into how your board functions. In this guide, we will walk you through the step-by-step process of assembling a skateboard, from the parts you'll need to the tools required, along with some insightful tips.
Parts of a Skateboard
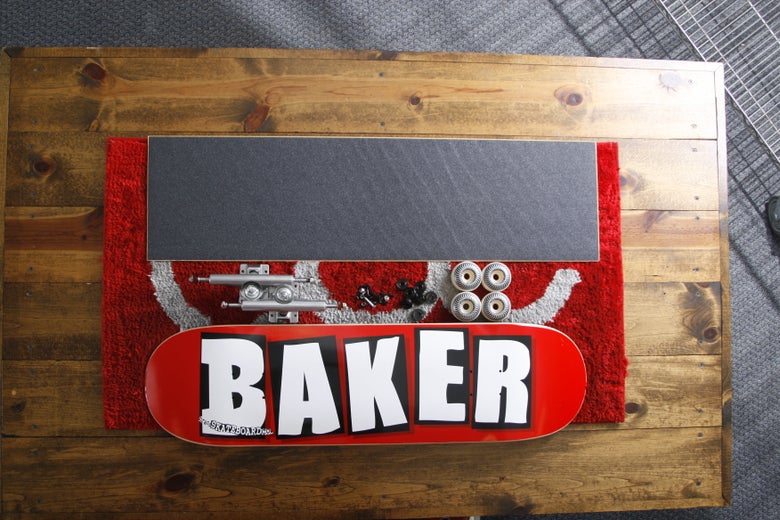
Before you begin building your skateboard, it's crucial to make sure you have all the necessary parts and components:
Deck: Decks come in various shapes and sizes, catering to different styles of skating. Choose a deck that suits your preferences and style.
Trucks: Trucks are the metal components that attach to the deck and hold the wheels. Trucks influence your skateboard's stability and turning ability. Make sure to select the right size of trucks for your deck. We typically recommend keeping your trucks within a quarter inch of the width of your skateboard deck. So if you ride an 8.25” deck, you would want to have skateboard trucks that are between 8” and 8.5”.
Wheels: Skateboard wheels come in different sizes, hardness levels (durometer), and shapes. The choice of wheels depends on your style of skating. Softer wheels provide better grip, while harder wheels are ideal for tricks and slides. For more information on wheels, you can read our how to choose skateboard wheels article.
Bearings: Bearings are small, round components that fit inside the wheels and allow them to roll. They come in different grades, with ABEC ratings indicating their quality.
Griptape: Griptape is a rough, sandpaper-like material applied to the top of the deck. It provides traction and helps you maintain control over the board.
Hardware: Hardware consists of screws and nuts used to attach the trucks to the deck. Standard skateboard hardware comes in sets of eight, with four screws for each truck.
Tools For Building a Skateboard
.JPG&nw=780)
To build your skateboard, you'll need a few tools:
Skate Tool: A skate tool is a compact, multi-purpose tool that includes a wrench for tightening or loosening your trucks, as well as a screwdriver for attaching your hardware. You can also use a standard screwdriver and wrench if needed.
Razor Blade or Utility Knife: You'll need this to trim the griptape to match the shape of your deck.
Poker: A poker will be needed to poke holes for your hardware.
Skateboard Assembly Steps
Now that you have gathered your components and tools, let's get into the assembly process. Below are detailed instructions on how to build a skateboard. You can also view our video guide above as an additional resource for how to build a complete skateboard.
Apply Griptape
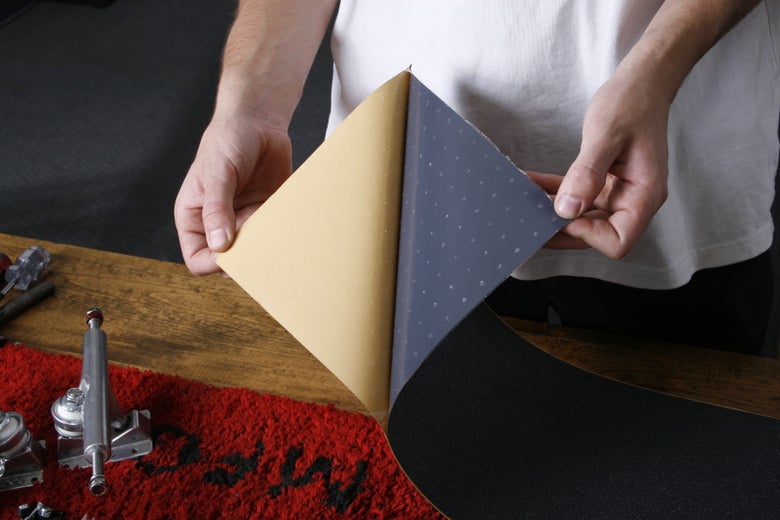
- Peel the protective backing off the sheet of griptape.
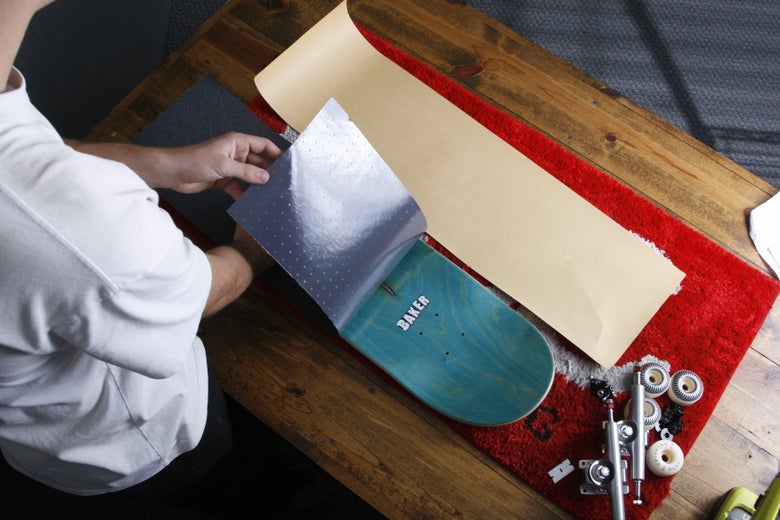
- Carefully take the sheet of griptape, sticky or adhesive side down, and slowly place it on the skateboard. You’ll want to make sure the griptape is centered over your board, covering the entire top of the skateboard deck.
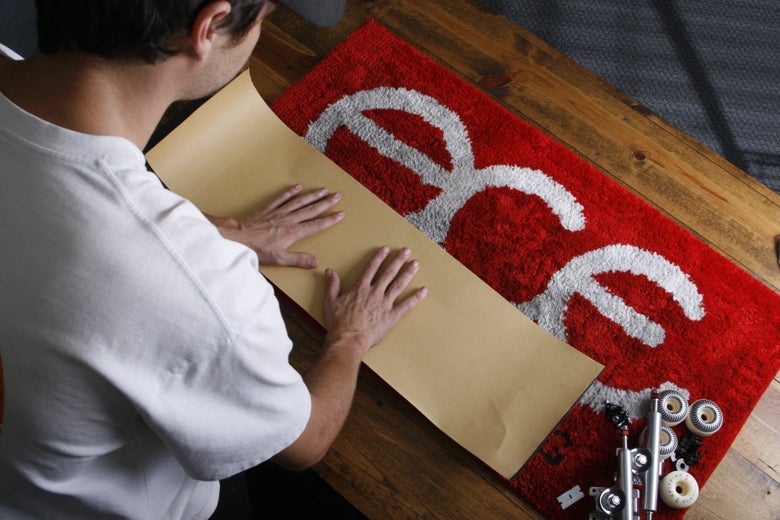
- Take the backing you peeled off the griptape sheet and put it on top of the skateboard. Firmly press your hand down on the center of the skateboard and continue to do this up to the nose and tail. The purpose of this is to make sure the griptape sticks to the skateboard and also to get rid of any air bubbles that may be seen. You will want to continue pressing down on the skateboard until all air bubbles are removed. If you still see air bubbles after doing this, you can grab a razor blade and carefully use it to poke a hole in the griptape until the air bubble has flattened.
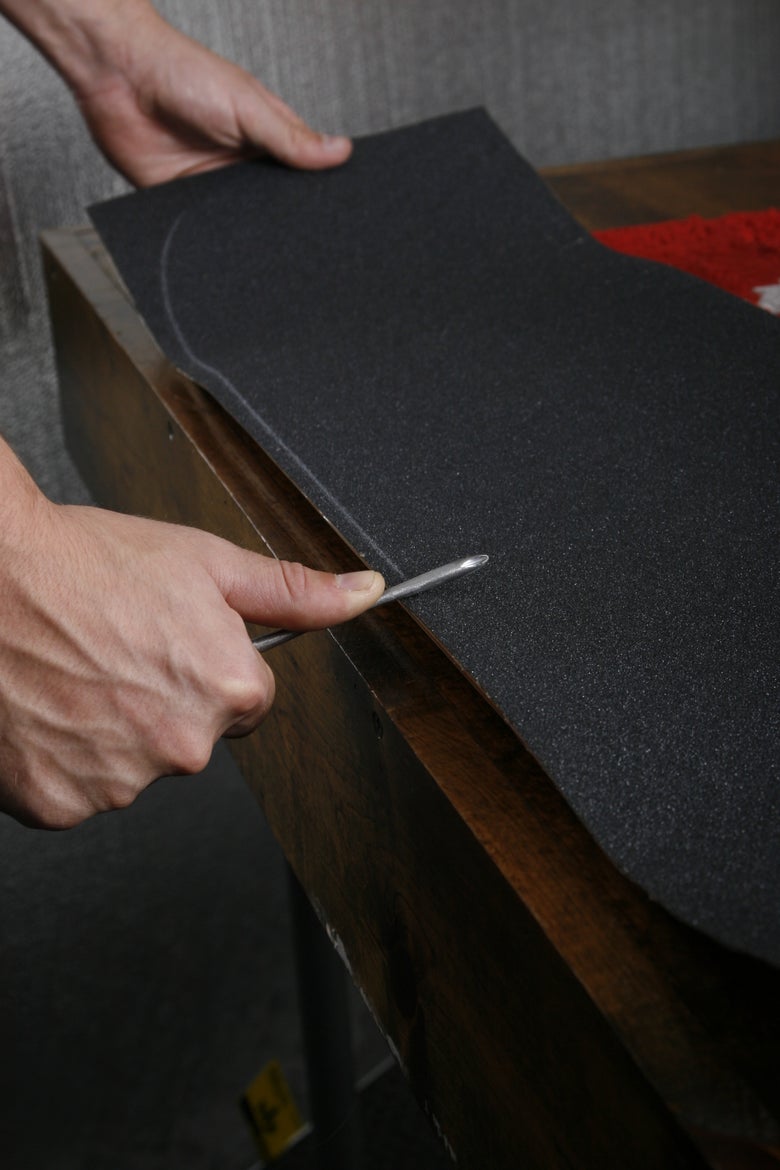
- Grab a screwdriver. Hold it at about a 45 degree angle and begin scraping around the edges of the skateboard until you see an outline of the skateboard deck.
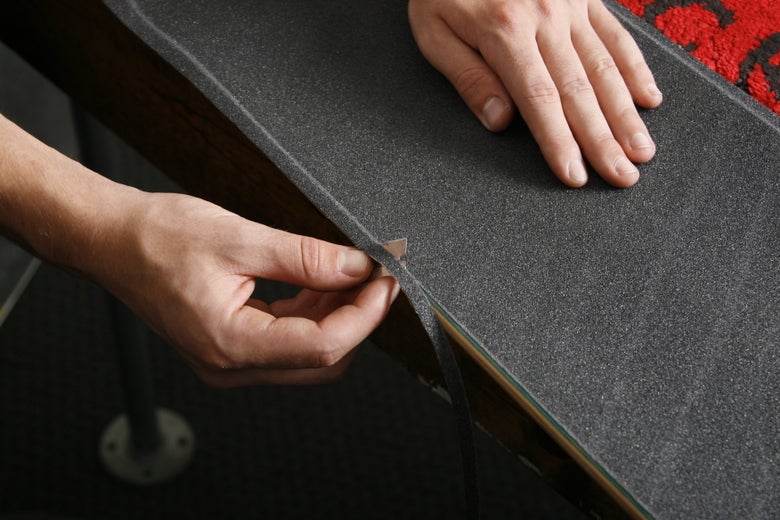
- Use the razor blade to cut from the bottom of the griptape on the edge of the deck, so you poke a little hole through. Firmly hold the razor blade against the board at about a 45 degree angle and start slowly cutting the griptape inward so you outline the deck. Take your time and cut the excess griptape until it is fully detached from the skateboard.
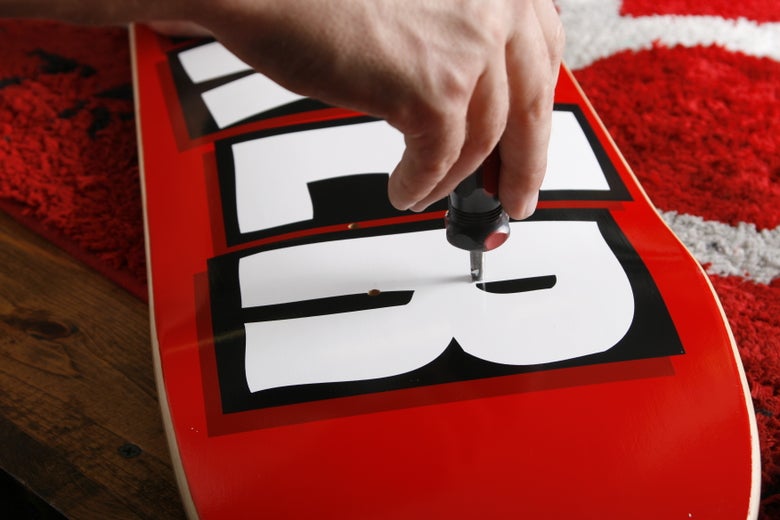
- Use the poker to poke holes from the bottom of your board where the hardware goes. To get rid of excess griptape, re-poke the hardware holes from the griptape side.
Attach Trucks
- Place the trucks on the deck, ensuring they are aligned with the bolt holes. You want to make sure the hanger (where you grind the truck) is facing the nose and tail of the board and not towards the middle of the board.
- Insert the hardware screws through the truck baseplate holes and deck.
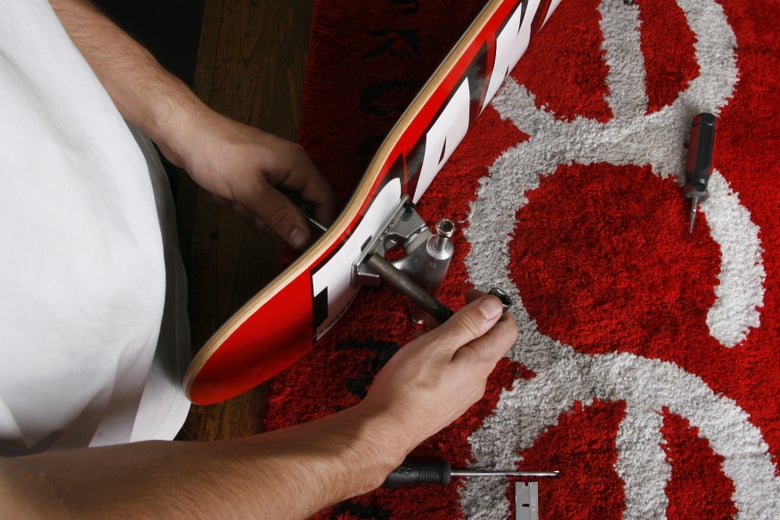
- Secure the hardware with nuts on the bottom of the board using the skateboard tool.
- Tighten the hardware evenly to ensure stability, but don't over-tighten to the point where the hardware sinks well below the griptape.
Install Wheels and Bearings
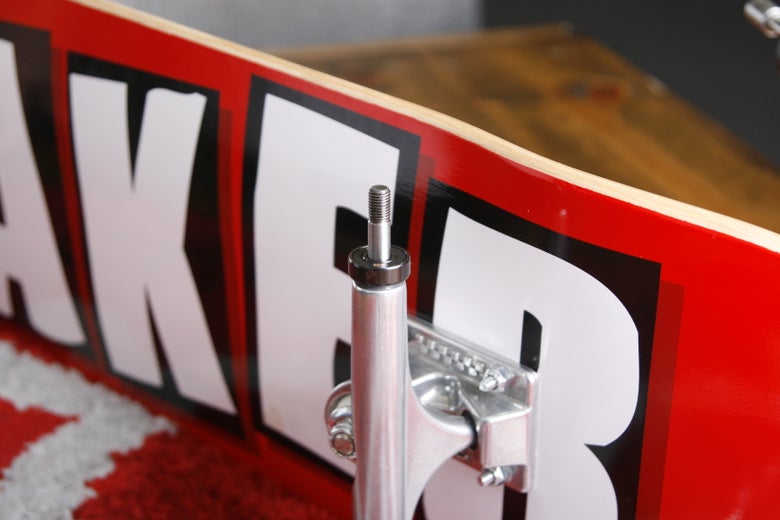
- Grab two bearings (One bearing for each side of the wheel).
- Set one bearing on the axle of the truck.
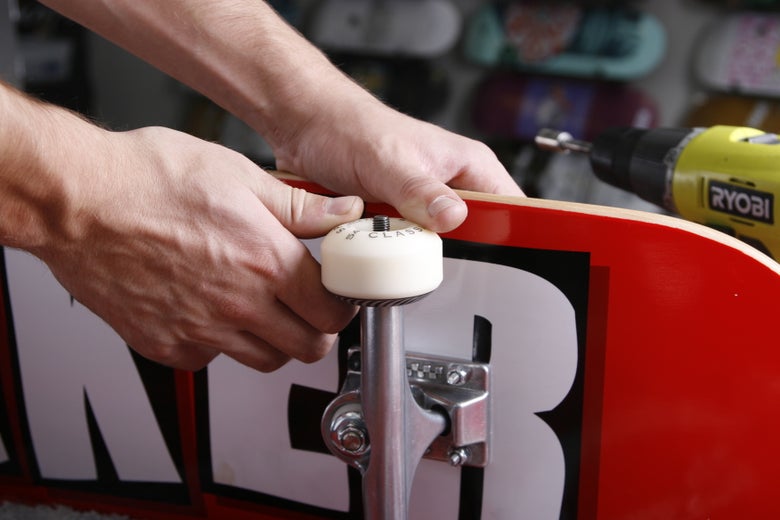
- Take your wheel and set it flush on the axle. Press down until the bearing pops into the wheel.
- Grab your second bearing and set it on the axle. Flip your wheel over and repeat step 3. Screw on your axle nut for that wheel with bearings inside.
- Repeat for other bearings.
That's it! Having followed these steps, you should have completed your skateboard assembly. Be sure to double-check your skateboard setup for any potential issues and follow along as we cover the most frequently asked questions that we've received from customers.
Skateboard Assembly FAQ
How tight should my skateboard trucks be?
This depends on your skate style and preferences but for beginners we recommend ensuring that your trucks are not too loose or too tight. The more loose your trucks are, the easier it is to turn or lean your skateboard deck but you sacrifice stability. The tighter your trucks are the harder it is to turn or lean your skateboard but you gain more stability. Adjust them using the skateboard tool to find your preferred level of stability and turning comfort.
Should skateboard wheels face graphic in or out?
There is no right or wrong answer to this. It's all a matter of personal preference. Some skaters like to display their wheel graphics when skating and some prefer having the wheel graphic facing in. Most skateboard wheels have a symmetrical shape, so it's up to you how you want your skateboard wheels to look. If you'd like to know more about the differences between skateboard wheels, you can view our comprehensive skateboard wheel buying guide.
How long do skateboard parts last?
Deck Lifespan: If you're skating at a moderate to advanced level multiple days a week, a skateboard deck can last anywhere from a few weeks to a few months. If you start to see stress cracks through the griptape, near the bottom of the board, or begin to have razor tail (When the plies at the tail of the skateboard deck scrape down and become sharp), then it's probably time to consider buying a new skateboard deck.
Wheels Lifespan: Skateboard wheels typically last a little longer than skateboard decks. It's not uncommon to skate your wheels for multiple months but you should consider changing them out once they wear down in size.
Bearings Lifespan: Depending on the quality of your bearings and how clean you keep them, skateboard bearings can last anywhere from a few months to over a year. You know it's time to change out your bearings if they start to roll slower or barely roll at all when you spin the wheel with your hand.
Trucks Lifespan: Skateboard trucks tend to last the longest and can usually be skated from anywhere to a year to multiple years. If you see stress cracks on your skateboard trucks, it's time to replace them.
How do I know if my skateboard is ready to ride?
Before stepping onto your skateboard, double check all hardware and bolts to ensure everything is securely fastened. If everything is secure, you're ready for a test ride! During your test ride, be sure to think about how the deck feels and turns under your feet. Feel free to adjust the truck tightness to your specific needs. With time and practice, you should begin to better understand your personal skateboard preferences and adjust your parts accordingly.
Final Thoughts
Assembling your skateboard is a rewarding experience, allowing you to tailor your setup to your personal preferences. By following the steps outlined in this guide you'll be well on your way to starting off your skateboarding experience on the right foot. Keep honing your skills and GO SKATE!
If you have any further questions or need more assistance, we highly recommend watching our skateboard assembly video guide. You can also reach out to our helpful customer service team at info@skatewarehouse.com or at 1-800-GO-SKATE.
Ready to build your own complete skateboard? Use our custom Skateboard builder!
Our complete skateboard builder helps create your ideal skateboard setup! Our builder is easy to use, offering only compatible parts for the skateboard deck you choose.
Don't want to assemble the skateboard yourself? Let our team handle it. Assembled or unassembled, you'll still save on your custom skateboard!
